maytag dryer belt replacement diagram
You can use this washing machine parts diagram to get an idea of where basic parts are located inside a washing machine. To inspect the drive belt remove the belt cover and look for any signs of a missing or damaged drive belt.
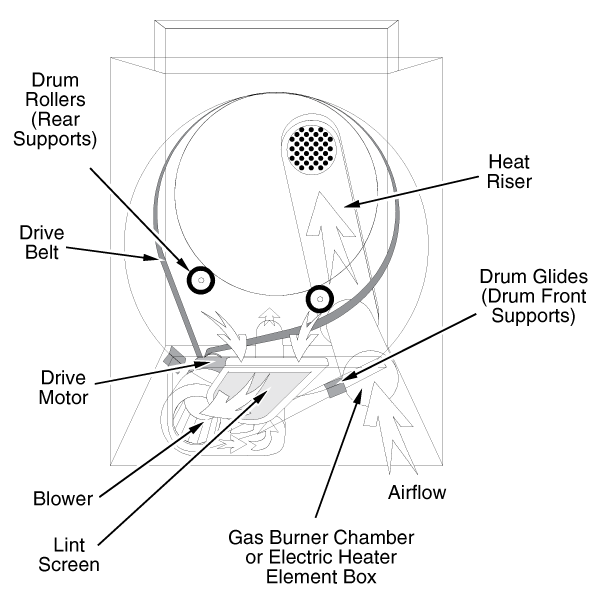
Maytag Dryer Repair Maytag Dryer Belt Diagram Replacement
Heres the parts diagram for this model.

. This item is available as an individual replacement part please see illustrated diagram for associative parts. You demand excellence and thats why you chose the dependability of Maytag brand. The most common reason to replace the drive belt is if it is broken and the dryer drum is not turning.
If youre having an issue with a particular washer part read the Maytag guide to washer troubleshooting or consult your owners manual. It comes in black and is made of rubber. Why settle for replacement parts that arent up to your high standards.
Make sure the breaker to the oven is OFF first. If the drive belt that drives the auger system becomes loose or breaks the snow blower will no longer be able to blow snow. The belt attaches to.
The belt transfers the rotation of the motor to turn the drum. Maytag Replacement Parts by Category. Replacing the rib belt could solve symptoms such as a screeching noise when the dryer tumbles a broken belt dryer will not tumble if its broken no heat or not enough heat or the dryer will not start.
Exact locations may vary from top to front load machines as well as model to model. Use only factory certified parts to keep your appliancesand your warrantyin good working order. This dryer drum belt Whirlpool Dryer Belt Drive Belt has four ridges three grooves and is 14 wide and 92 14 inches in length.
We have a huge selection of replacement oven door glass so that you can get your oven back up and running in no time. The belt has a length of 93- 36 inches and wraps all the way around the dryer drum around a tension pulley and then around the drive motor pully. Parts for KitchenAid KEBS107DAL1 Oven To remove the control panel---Open the oven door and you will see screws holding the side trim in place.